


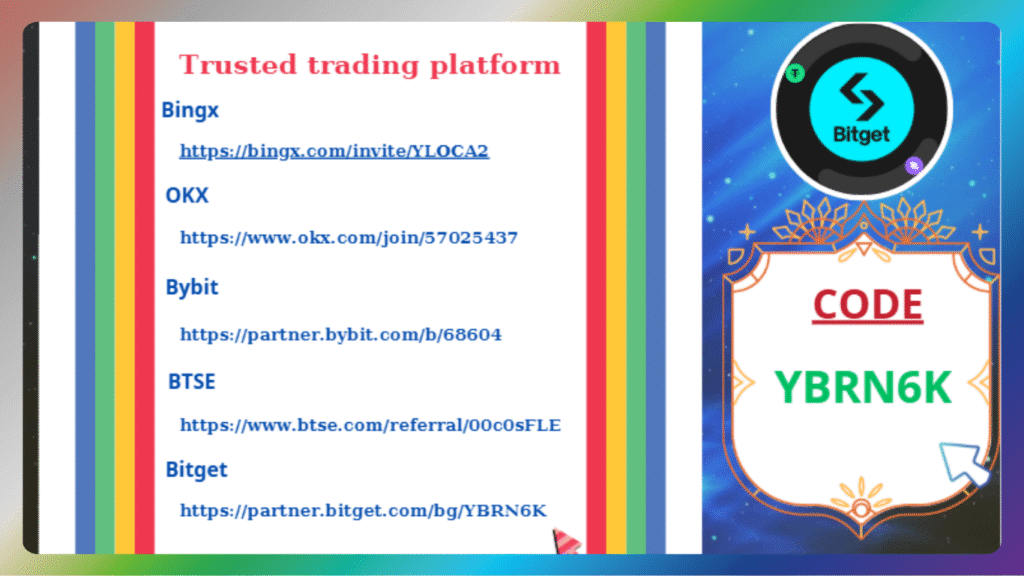
PART 1: What is Bitget?
Bitget is a fast-growing cryptocurrency exchange known for copy trading, spot and futures trading, and competitive fees.
Founded in 2018, it now serves millions of users globally with robust security and 24/7 support.
PART 2: How to Register an Account on Bitget
Step 1: Visit the official website at www.bitget.com or download the Bitget app from the App Store or Google Play.
Step 2: Click the “Sign Up” button at the top right corner.
Step 3: You can sign up using your email or phone number.
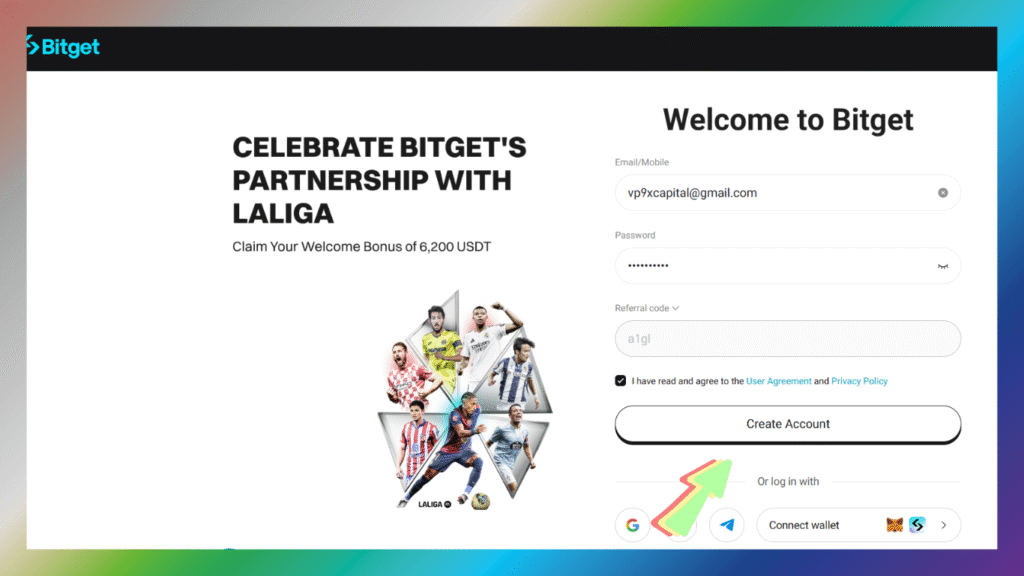
Step 4: Enter a strong password and confirm it.
Step 5: Input the verification code sent to your email or phone.
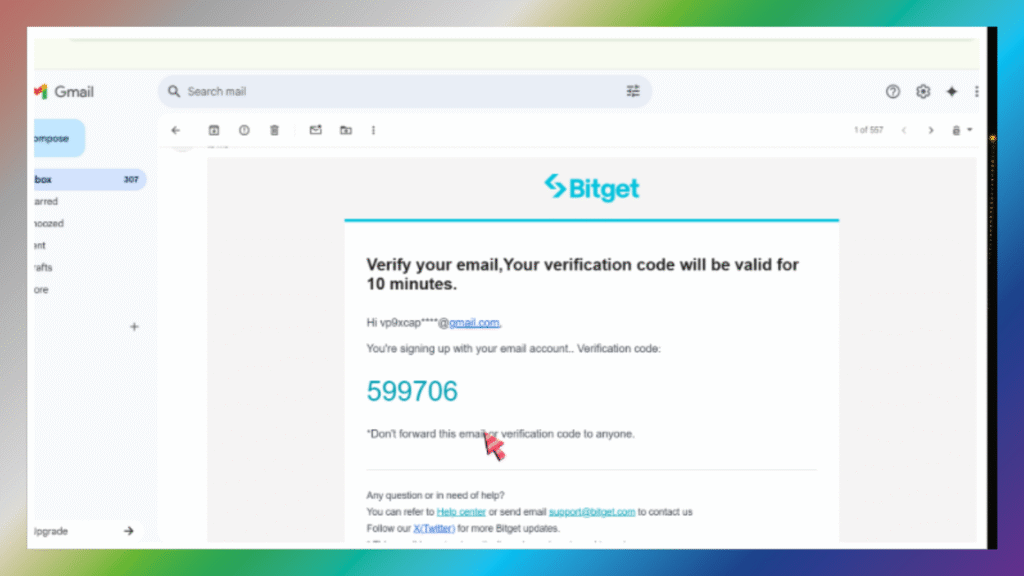
Once verified, your account is successfully created.
PART 3: Why Identity Verification (KYC) Is Important
KYC stands for “Know Your Customer” — it’s required to unlock full features and ensure security.
You’ll need to verify your identity to increase withdrawal limits, trade P2P, and access features like Launchpad.
Bitget uses KYC to prevent fraud, money laundering, and to comply with regulations.
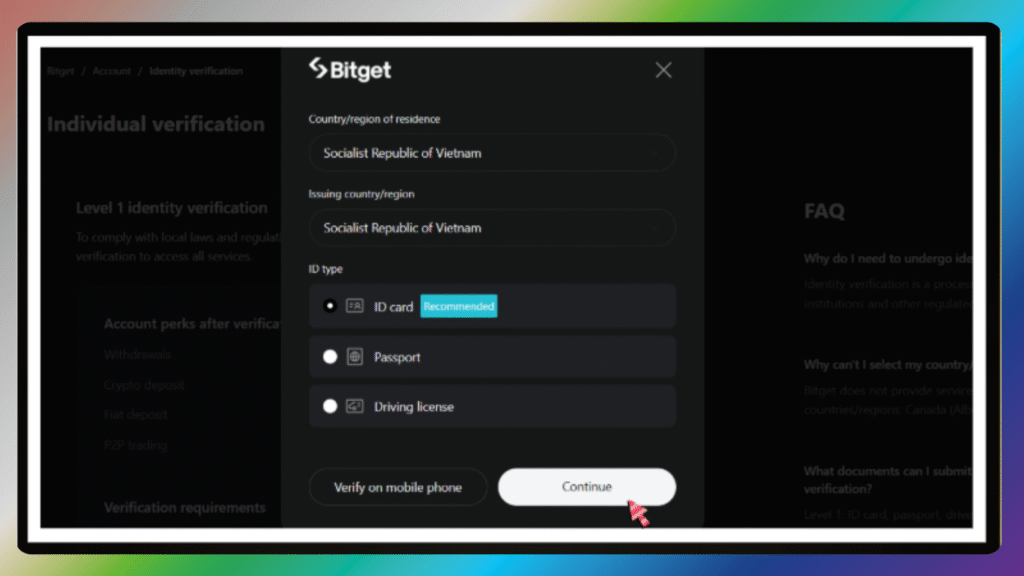
PART 4: How to Complete KYC on Bitget
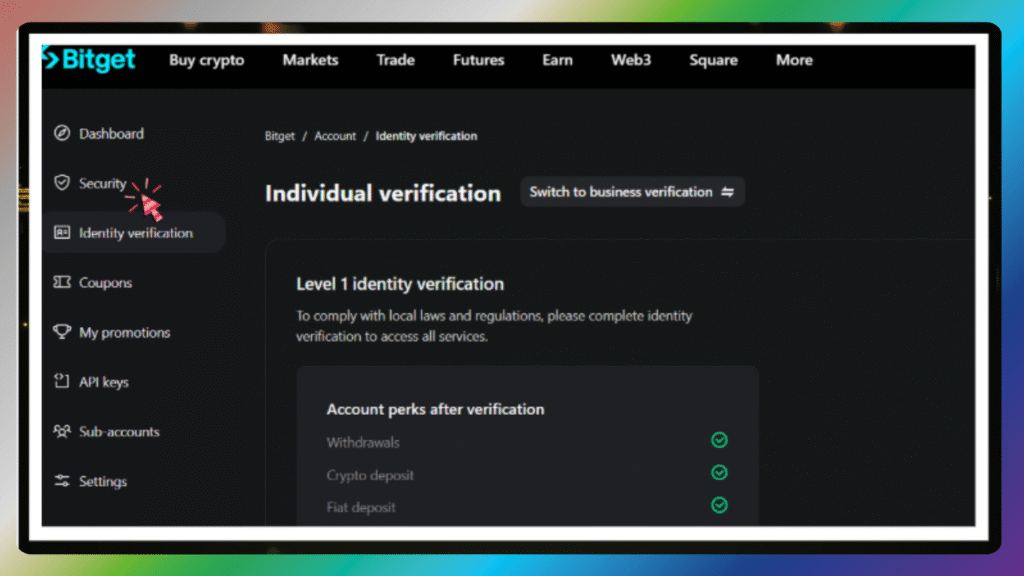
Step 1: After logging in, go to your profile icon and select “Identification” or “Verify Now.”

Step 2: Choose your country and document type (Passport, ID card, or Driver’s License).
Step 3: Upload clear photos of the front and back of your ID.
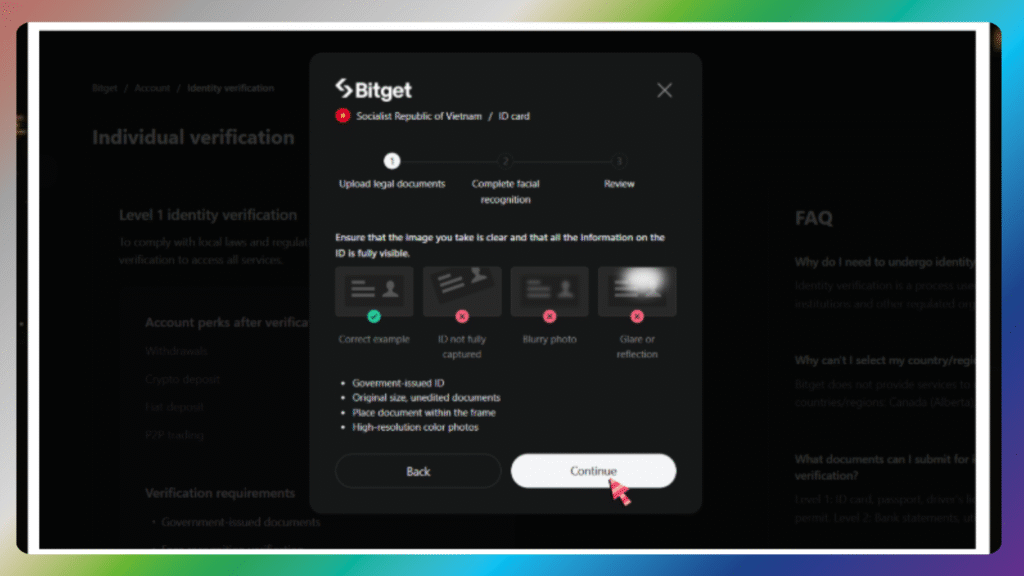
Step 4: Take a selfie or record a video for facial recognition.

Step 5: Submit and wait for approval — usually completed in 5 to 30 minutes.
PART 5: Common KYC Mistakes to Avoid
Don’t upload blurry or dark images — everything must be readable.
Use your legal name that exactly matches your ID.
Don’t use filters or edited documents — this will lead to rejection.
PART 6: Enable Two-Factor Authentication (2FA)
To secure your Bitget account, activate 2FA using Google Authenticator.
Go to “Security Settings” → “Google Authenticator” and scan the QR code.
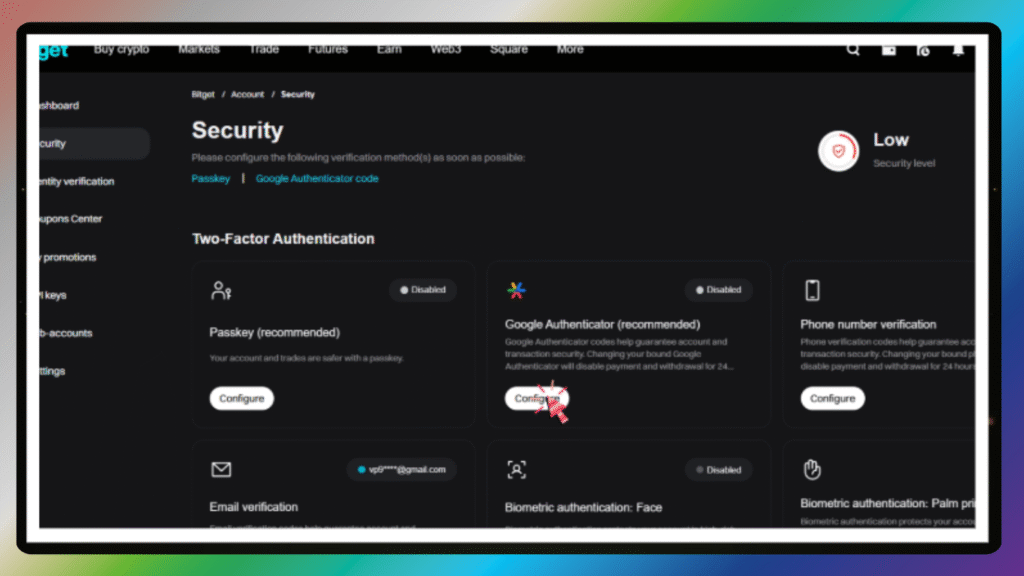
Enter the code shown in the app to complete setup.
This helps prevent unauthorized access to your funds.