


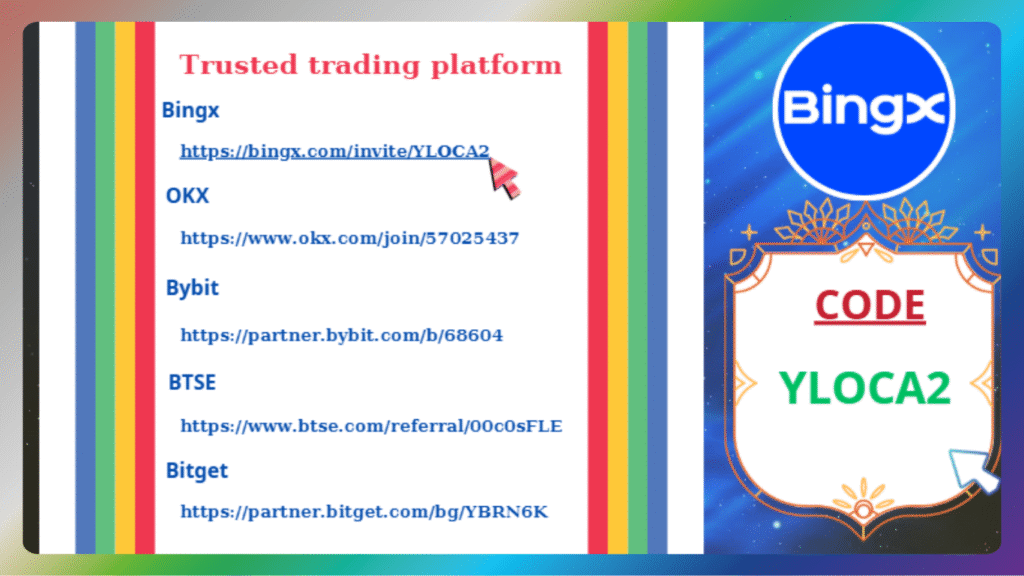
Let’s start by registering an account on BingX.
You can use either your email address or your phone number.
Step 1: Go to the official BingX website: www.bingx.com
Step 2: Click on the “Sign Up” button on the top right.
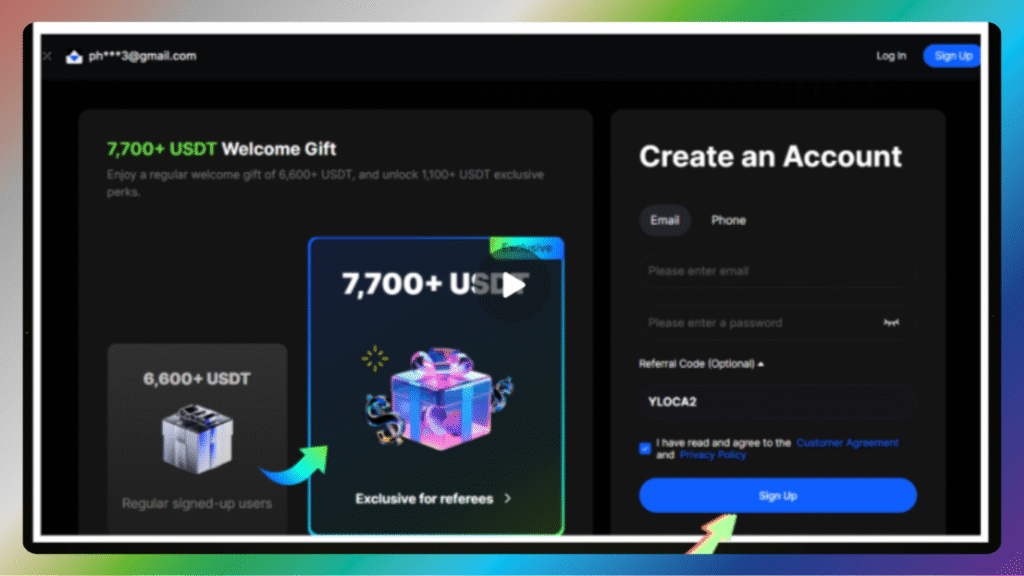
Step 3: Enter your email or phone number, create a password, and click “Next”.
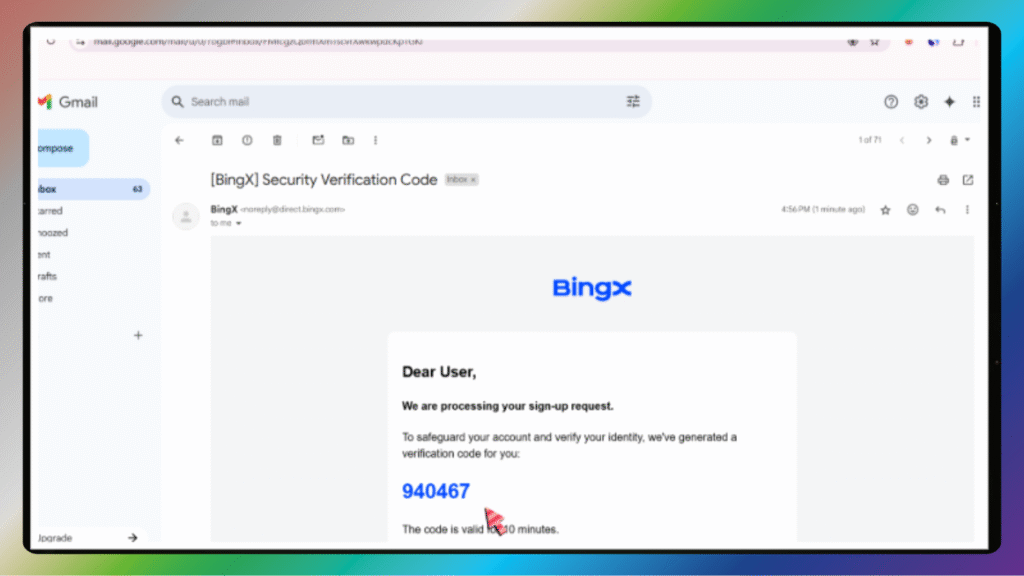
Step 4: You’ll receive a verification code via email or SMS. Enter it to continue.
Tips: Use a secure email and a strong password.
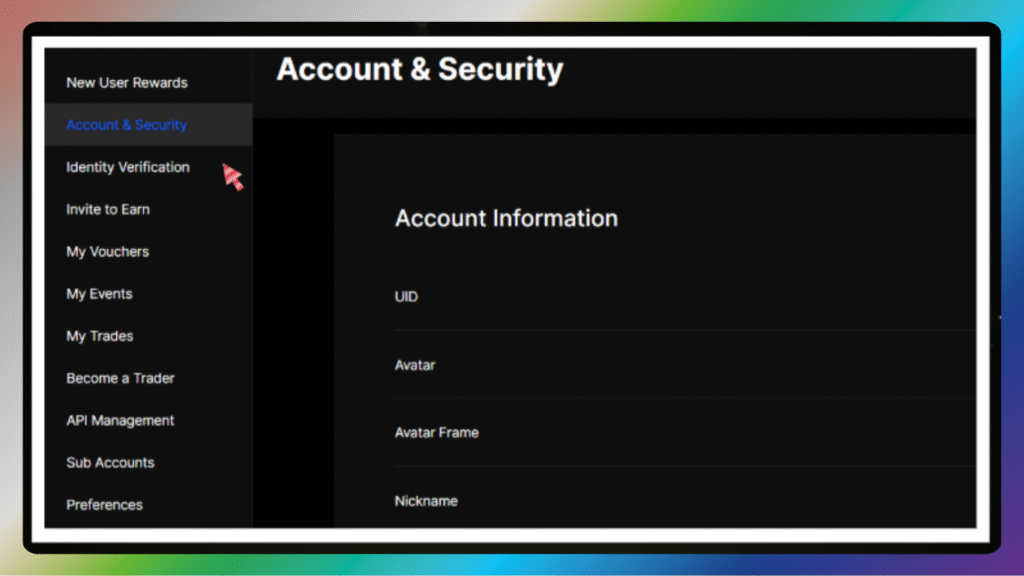
Security Settings
After registration, security comes first.
Step 1: Go to your account settings and enable 2FA – Two-Factor Authentication.
Step 2: You can use Google Authenticator or SMS verification.

We recommend Google Authenticator for stronger security.
Scan the QR code, enter the 6-digit code, and you’re done.
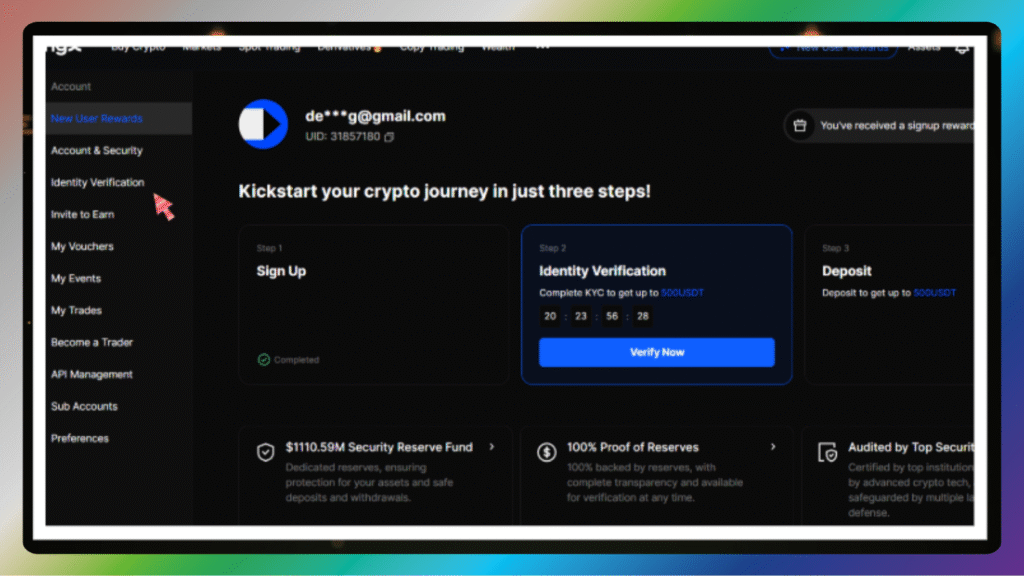
Identity Verification
To unlock all BingX features, you need to verify your identity – also known as KYC.
Step 1: Go to “Account” → “Identity Verification”.
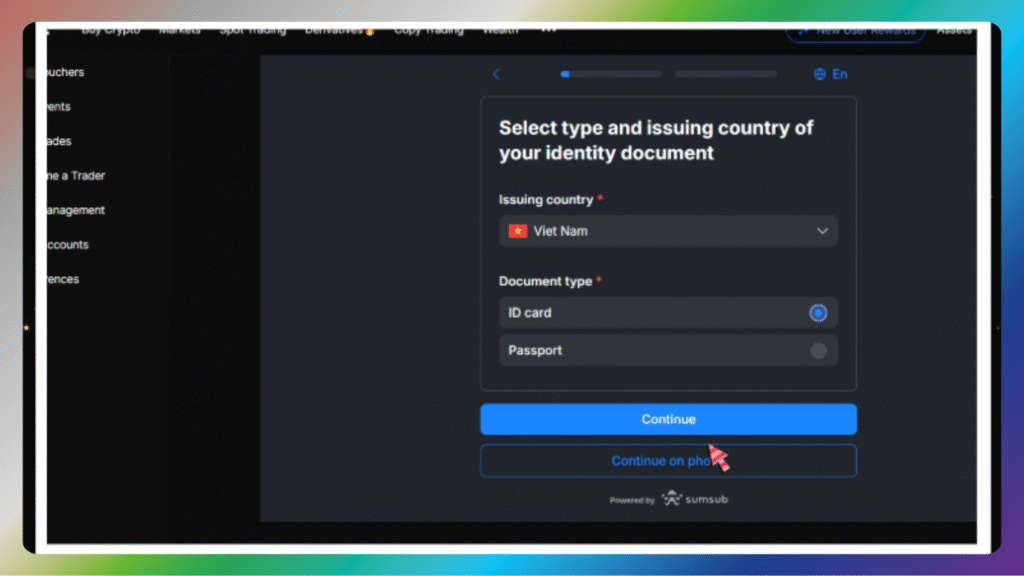
Step 2: Choose your country and ID type: passport, ID card, or driver’s license.
Step 3: Upload front and back photos of your document.

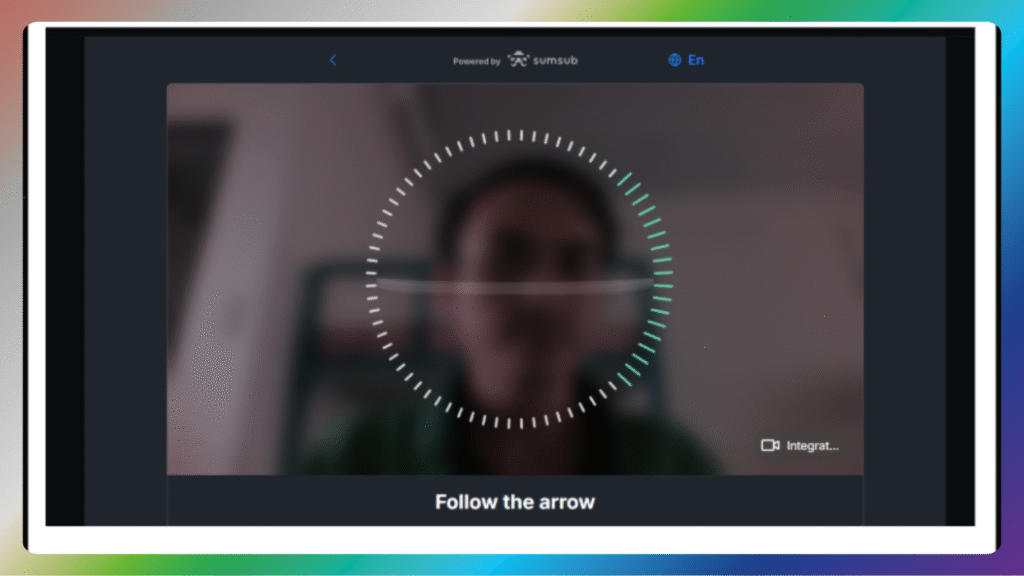
Step 4: Take a selfie holding your document for face verification.
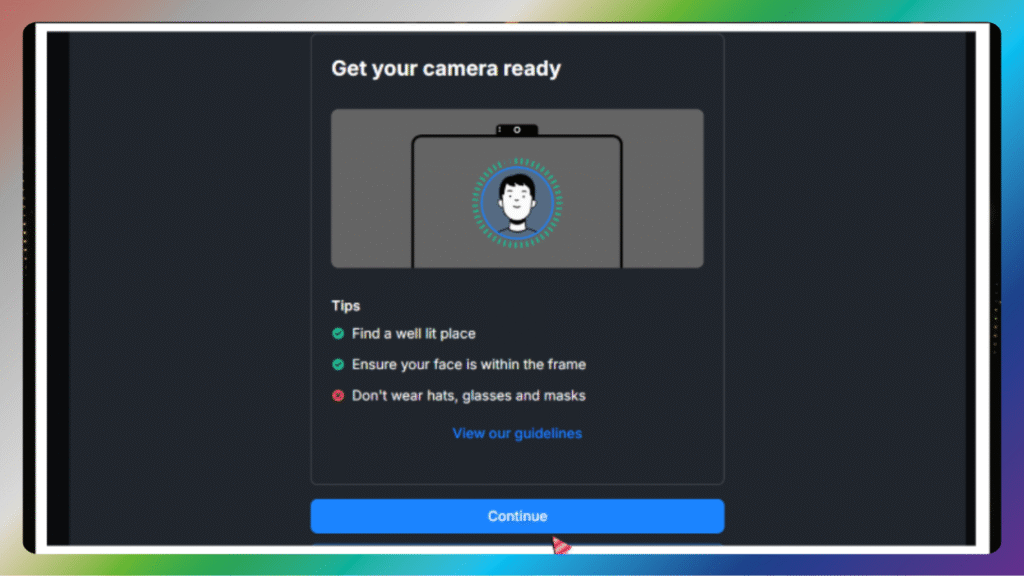
Step 5: Make sure your face is clear and the text is readable.
Verification usually takes 10–30 minutes.